Remington Model 700 XCR Tactical Long Range 300 Win Mag

Tuesday, September 20, 2011
Saturday, September 3, 2011
Tuesday, April 26, 2011
What is more accurate a barrel that is CLEAN or DIRTY?
This is a debate for the ages. Some swear by cleaning their rifle constantly while others wouldn't think of ever cleaning their rifle for fear they might lose the accuracy they cherish. So which is it? What is more accurate, a barrel that is dirty or clean?
This last time out to the range my objective was to test a series of ten loads I developed to determine which would shoot the best groups. Having thoroughly cleaned my barrel after the last outing I knew I was starting out with a squeaky clean barrel. My concern was that having a clean barrel to start with would produce better groups with the first few loads and then they would gradually get worse as the barrel fouled. I resolved to do a good cleaning between each 3 shot group to eliminate any inconsistency. WHAT A ROOKIE MISTAKE and it showed. My groups weren't impressive and once again I came away very disgusted that I wasn't getting the sub moa accuracy I expected. At first I blamed it one using a my bipod on a less than perfect shooting bench rather than sand bags and resolved to buy my own set of bags immediately.
What I learned:
After sharing my dilemma with Ryan from "The Road to Precision" series on youtube I learned a valuable lesson that I'd like to share. If you have watched Ryan's series you know that he is extremely scientific in his approach and even encroaches on being a little OCD at times so I trust that before he says anything it has been tried and tested to the extreme. What he shared was surprising and gives me hope that my groups will be better the next time around.
Here is what Ryan had to say about FOULING FOR ACCURACY:
Your first shot through a clean barrel is always a fouling shot and should never be counted in the group. That said, it it also wise to track where that shot tends to land, because first shot placement will always be off a little from the main group. If you are hunting with the rifle and don't have time to foul the barrel before that big moose shows up, you are going to want to know where that first shot will place from a clean barrel.
when I first started into shooting, I was religeous about cleaning every 10-20 shots. Then I read an article about cleaning frequency VS. precision. Simple put, only custom rifles in the extreme Bench rest competitions need to be cleaned between groups, everyone else WILL BENEFIT from a dirty barrel.
So I put the theory to the test. I shot alot of groups and didn't clean at all for 200 rounds. I should have documented my results, because it showed what most others are finding.
From round 1 until about 20, the groups were on the larger side. As I passed the 20 mark the groups started to shrink. I found the best groups happened between 50 and 75ish rounds. as I worked my way to 100 and beyond, the groups started to open up again.
Becasue of this, I never clean until I have at least 100 rounds down the tube. And I try to make sure I have at least 10 rounds through the barrel before I go to a competition, because a standard competition uses about 65 rounds total, and I want to see good precision on the 900 meter line.
There are also some really good articles out there on the net, written by Gale Mcmillan. Its really hard to argue with someone who has changed the firearms industry.
The one I specifically like, he bashes the barrel break-in routine. Calls it a big waste of time and bullets. Also has proof that a fellow gun smith started it as a rumor to help increase barrel sales. The rumor stuck and now everyone belives it as LAW. Funny stuff coming from a master rifle builder.
Here's a video from the Best of the West Series on the Same Topic
Interview with John Krieger, custom barrel maker and legend. Talks about cleaning & break in at 4:00 into video.
Wednesday, April 13, 2011
New Stock - Still not impressed but happy.
So it took Remington about 2.5 weeks to get me a replacement stock but it was FREE and overall they were great to work with. Here's the good and the bad.
The Good - after installation the barrel was again free floating.
The Bad - the fit and finish around the barrel was once again uneven one side to the other.

After visiting with my Gunsmith Ron in Encinitas he suggested that perhaps the posts on my action were the problem, ie they aren't perfectly straight. I may contact Remington about this issue and the likelihood that they would repair it but for now I'll live with it.
I intended to have him pillar bed the rifle to improve accuracy which would also allow him to place the pillars such that it would properly align the action with the stock. However, after spending more than an hour picking his brain he talked me out of having him do anything to the rifle for the time being. Instead he suggested focusing on load development before doing any upgrades to the rifle itself. He said that as it is the rifle should should shoot MOA (1" group at 100 yds) as it is with a good load. I fully expected Sub-MOA accuracy from this rifle out of the box but to be honest have only tested it once and wasn't impressed. After our conversation it became evident that a dirty barrel, wind conditions and a poor powder choice may have been to blame.
I tried to pry a list of upgrades in order of importance from Ron but he was reluctant. Here is my best shot at it.
Here is the basic process he suggested -
- Load Development - Find the powder, projectile, primer and seating depth that produces the best results both in accuracy. Consistency being more important than higher velocity.
- Gunsmithing - It was difficult to get him to list the different accuracy upgrades in order of importance but he for the average rifle he suggested the following
- Free Float Barrel - ie. upgrade your stock or modify your current stock by bedding or pillar bedding. (in my case the barrel is now floating and he seemed to think I was getting good contact between the action and aluminum bedding block based on the even rub marks on the bedding so he didn't think spending the money for pillars was worth it at this time.)
- Trigger Job - Most triggers come from the factory at 4-8 pounds. A 1.5 - 3 lbs trigger is best. (mine came from the factory at a surprisingly good 3 lbs so spending $50 for a half pound adjustment isn't warranted on a tight budget)
- Blue Printing or Truing - Disassembly of the action and barrel, truing both surfaces resulting in better alignment. The bolt face and lugs (knobs on the bolt that lock it forward when closed) are also trued to ensure a flush contact surface, even pressure distribution and a consistent fit shot to shot. By removing the bolt and examining the bolt lugs you can look for irregularities such as the signs of rubbing which indicate an uneven distribution of pressure. (mine lugs did show signs of uneven wear) Ron charges $45 to true each component. ($135 for barrel, action & bolt)

You can see the bluing is rubbed off only on the outside edge indicating that this is the only point on the lug that's making contact. After truing the fit would be custom milled ensuring contact is even across the lug face.
Optional Upgrades -
- Muzzle Brake - The 300 Win Mag can be brutal to shoot repeatedly do to heavy recoil. A good recoil pad can help but a muzzle brake will drastically reduce the recoil. Heavy recoil left uncontrolled can lead to Flinching which dramatically hinders shot to shot consistency and can be a difficult habit to break. Ron charges $50-75 to install a muzzle brake that you provide. Brakes cost between $75 and $200. Popular muzzle brakes - Ops inc, Badger Ordinance, Holland, Vais, JP, Defensive Edge.
- Tactical Bolt Knob - Looks great and makes cycling the bolt much easier thanks to the added size, weight and angle of the bolt know. About $35 for the average knob and $40-60 to install.
Additional Major Upgrades
- Match Grade Barrel - A Krieger or Lilja barrels are phenomenal but pricey. They won't get dirty as quickly and can increase accuracy significantly. $300 - 500 depending on the barrel.
I've taken Ron's advice and started loading a new series of loads for testing and even jumped the gun a bit and started toying with seating depth. I'll post a video on how to effectively find overall length without buying any expensive tools or gauges.
Tuesday, March 15, 2011
BAD NEWS & GOOD NEWS
Bad News -
I thoroughly cleaned the 300 last night with Barnes CR-10 copper solvent and Kroll oil. Afterwards I decided to take the rifle apart for the first time and continue my cleaning a bit more. Don't ask me why I thought this was necessary but now I'm regretting the decision. After reassembling the action & stock I proceeded to check the float of the barrel by running a piece of paper the barrel and the stock. Unfortunately the paper wouldn't go in at all and I was furious. I tried several more times after loosening, adjusting and retightening the action but to no avail. So currently my barrel is not free-floating as it should so my accuracy is going to be crap until I find a remedy which is incredibly frustrating.

Good News -
First this this morning I called up Remington to get some answers. After waiting on hold for 5-10 minutes I spoke with an associate in repairs named Andrew. I told him the whole story about taking it apart and reassembling only to find that my barrel was no longer floating.
I also told him that when I purchased the rifle in 2008 I took it home and after a thorough inspection I wasn't impressed at all with the fit and finish of the stock around the barrel. On the right side the space between the barrel and stock was about 1/32 of an inch whereas the left side was about 1/8" of an inch. I took it back to Gunnies in Orem where I bought it and explained. They said that as long as a dollar bill can easily be passed between the two it should have no effect on the accuracy. At that point we tested it and though the dollar came out a bit dirty, it did indeed slide between the two without a problem. Being still unimpressed with the fit and finish of my brand new $1200 rifle that supposedly is Remington top of line and has one of the best aftermarket stocks on the market I asked if I could swap it out for another one, given that it was unfired. Unfortunately they had only ordered one in 300 Win Mag and it took over 4 months to arrive so getting another one was going to be a long process. After already waiting so long I wasn't about to do that. In hindsight I wish I had being it took me 3 yrs to save enough to buy the scope I wanted and finally be able to shoot the rifle. At the time I had the intention of selling the original stock anyways and getting another that was even more target/tactical in it's design and features such as the McMillan A-5 or A-4 or the Bell & Carlson A-5 Medalist that comes on the Model 700 XCR Target Tactical .308


After my story Andrew took the serial number for the rifle and after a few minutes said that he would have a new stock to me in 2-3 weeks as well as return postage for my current one so I could send it back. I was impressed. They hardly asked any questions and just took care of business. The only remark I have would be that 2-3 weeks is a rather long time in today's ultra competitive market. I think they could get it to me in a week if they really wanted to but I'm just happy that they had such a great "no-none-sense" approach to my problem.
I'll update when the new stock arrives in a couple weeks. Hopefully this one
Great Customer Service at Remington - Thanks Andrew.
I thoroughly cleaned the 300 last night with Barnes CR-10 copper solvent and Kroll oil. Afterwards I decided to take the rifle apart for the first time and continue my cleaning a bit more. Don't ask me why I thought this was necessary but now I'm regretting the decision. After reassembling the action & stock I proceeded to check the float of the barrel by running a piece of paper the barrel and the stock. Unfortunately the paper wouldn't go in at all and I was furious. I tried several more times after loosening, adjusting and retightening the action but to no avail. So currently my barrel is not free-floating as it should so my accuracy is going to be crap until I find a remedy which is incredibly frustrating.
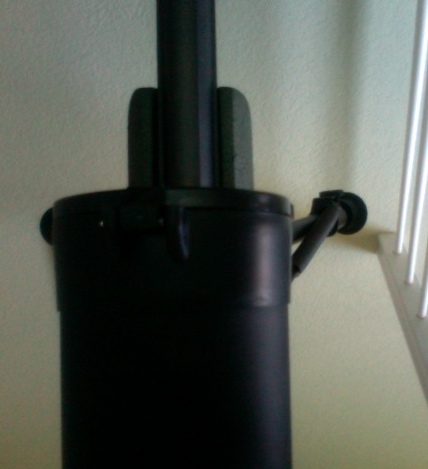
Wasn't impressed with the fit & finish of the barrel to stock from the beginning as you can see it's not stellar.
First this this morning I called up Remington to get some answers. After waiting on hold for 5-10 minutes I spoke with an associate in repairs named Andrew. I told him the whole story about taking it apart and reassembling only to find that my barrel was no longer floating.
I also told him that when I purchased the rifle in 2008 I took it home and after a thorough inspection I wasn't impressed at all with the fit and finish of the stock around the barrel. On the right side the space between the barrel and stock was about 1/32 of an inch whereas the left side was about 1/8" of an inch. I took it back to Gunnies in Orem where I bought it and explained. They said that as long as a dollar bill can easily be passed between the two it should have no effect on the accuracy. At that point we tested it and though the dollar came out a bit dirty, it did indeed slide between the two without a problem. Being still unimpressed with the fit and finish of my brand new $1200 rifle that supposedly is Remington top of line and has one of the best aftermarket stocks on the market I asked if I could swap it out for another one, given that it was unfired. Unfortunately they had only ordered one in 300 Win Mag and it took over 4 months to arrive so getting another one was going to be a long process. After already waiting so long I wasn't about to do that. In hindsight I wish I had being it took me 3 yrs to save enough to buy the scope I wanted and finally be able to shoot the rifle. At the time I had the intention of selling the original stock anyways and getting another that was even more target/tactical in it's design and features such as the McMillan A-5 or A-4 or the Bell & Carlson A-5 Medalist that comes on the Model 700 XCR Target Tactical .308

McMillan A-5

McMillan A- 4 (Thicker Forend)

Bell & Carlson A - 5 Medalist
After my story Andrew took the serial number for the rifle and after a few minutes said that he would have a new stock to me in 2-3 weeks as well as return postage for my current one so I could send it back. I was impressed. They hardly asked any questions and just took care of business. The only remark I have would be that 2-3 weeks is a rather long time in today's ultra competitive market. I think they could get it to me in a week if they really wanted to but I'm just happy that they had such a great "no-none-sense" approach to my problem.
I'll update when the new stock arrives in a couple weeks. Hopefully this one
Great Customer Service at Remington - Thanks Andrew.
Monday, March 14, 2011
Home-Made Steel Target Testing
Steel is hands-down my haven't target material but if buying pre-maid targets is very expensive. After spending some considerable time searching forums I discovered steel target vendor that stood out from the rest - Las Vegas Steel Targets. Here's a video from their website of one of their innovative reactive steel targets.
The down side to these amazing targets is obviously the price. At this point I just can't justify $2-300 for a target so last week Eddie and I visited several scrap yards and metal retailers in search for a do-it-yourself alternative. The first metal yard had a huge selection of scrap as well as a whole section of pre-cut target sized pieces of varying sizes and thickness. Apparently they had seen guys like us before and had exactly what we were looking for, specifically a 1/2" thick by 18" diameter circular steel plate as well as some smaller 10" & 12" square and circular versions. The downside once again was the price. The 18" plate was nearly $50 which isn't horrible but it was only 1/2"which we weren't certain would withstand a 300 Win Mag at less than 500 yards. We did find several thicker 3/4" and 1"+ plates but the price was $.55 to $.60 per pound just like the 18" plate but heavier. Once again we were looking at $50+ and thought we could do better.
At the second location, more of a scrap yard than a retail metal lot like the other we found a much smaller selection but we loved the $.40 per pound price for any scrap metal regardless of thickness. We settled on two 3/4" thick by 12" in diameter plates for $8.00 each which we thought was a "steal."'
From there I spent an hour at home depot deciding on something like a saw horse to hang it from. My initial thought was a foldable steel saw horse but at $30+ for the heavy version with adjustable legs and $18 for a light weight non adjustable version I found myself wanting the heavy adjustable version but only wanting to spend $18. I also realize that if placed on a hill which is likely going to be the case I would need the adjustable legs. In the end I bought neither and instead had a much better idea that was lighter, sturdier, cheaper, adjustable and packs away very compact.
Home Depot
- $6.50 for three 4 ft pre-cut lengths of rebar
- $3 for 3 ft of chain for hanging
- $3 for a roll of tie wire to lash legs together & mount plate to chain. (already had some)
Here is what I came up with -


My hope was that this steel was the the AR 500 that I read about in the forums or at least something close to it but based on the result I am now certain that it is just standard rolled steel and that even with the steel swinging it still was no match for the 300 Win Mag at 250 yards.


The moral of the story -
If you're going to make a steel target for large caliber rifles you have to use AR steel which is very expensive (approximately $1200 for 4' x 8' sheet) or buy your targets pre-made from Las Vegas Steel Targets (link is above.)
As for us, we're going to keep trying our luck at the scrap yards locally and we'll keep you posted.
The down side to these amazing targets is obviously the price. At this point I just can't justify $2-300 for a target so last week Eddie and I visited several scrap yards and metal retailers in search for a do-it-yourself alternative. The first metal yard had a huge selection of scrap as well as a whole section of pre-cut target sized pieces of varying sizes and thickness. Apparently they had seen guys like us before and had exactly what we were looking for, specifically a 1/2" thick by 18" diameter circular steel plate as well as some smaller 10" & 12" square and circular versions. The downside once again was the price. The 18" plate was nearly $50 which isn't horrible but it was only 1/2"which we weren't certain would withstand a 300 Win Mag at less than 500 yards. We did find several thicker 3/4" and 1"+ plates but the price was $.55 to $.60 per pound just like the 18" plate but heavier. Once again we were looking at $50+ and thought we could do better.
At the second location, more of a scrap yard than a retail metal lot like the other we found a much smaller selection but we loved the $.40 per pound price for any scrap metal regardless of thickness. We settled on two 3/4" thick by 12" in diameter plates for $8.00 each which we thought was a "steal."'
From there I spent an hour at home depot deciding on something like a saw horse to hang it from. My initial thought was a foldable steel saw horse but at $30+ for the heavy version with adjustable legs and $18 for a light weight non adjustable version I found myself wanting the heavy adjustable version but only wanting to spend $18. I also realize that if placed on a hill which is likely going to be the case I would need the adjustable legs. In the end I bought neither and instead had a much better idea that was lighter, sturdier, cheaper, adjustable and packs away very compact.
Home Depot
- $6.50 for three 4 ft pre-cut lengths of rebar
- $3 for 3 ft of chain for hanging
- $3 for a roll of tie wire to lash legs together & mount plate to chain. (already had some)
Here is what I came up with -

I was extremely proud of my home-made steel target and stand for less than $20.
Unfortunately, I was banking on the steel being more than adequate to withstand the 300 Win Mag at 200+ yards but I was sorely mistaken. After the first shot I could see through the scope that there was much more than a black splatter left on the plate, even at 250 yard it looked like a crater. I couldn't believe that the hole left behind nearly went all the way through the plate and was big enough to put my index finger in with room to spare.
CHECK IT OUT

My hope was that this steel was the the AR 500 that I read about in the forums or at least something close to it but based on the result I am now certain that it is just standard rolled steel and that even with the steel swinging it still was no match for the 300 Win Mag at 250 yards.

Back of plate protrudes from 300 Win Mag hit. Would have blown thru a 1/2" plate.

The larger holes are 300 Win Mag, the smaller & more shallow are .308 Win (far left edge & center of mass right)

The setup. 68 gr of Win 760 pushing 168 gr Speer BTHP at 3150 fps.

A look through the Nightforce NXS 5.5 - 22 x 56 mm with NP-R2 Reticle at 250 yds. (22 x shown)
The moral of the story -
If you're going to make a steel target for large caliber rifles you have to use AR steel which is very expensive (approximately $1200 for 4' x 8' sheet) or buy your targets pre-made from Las Vegas Steel Targets (link is above.)
As for us, we're going to keep trying our luck at the scrap yards locally and we'll keep you posted.
Saturday, February 19, 2011
Ladder Testing
 |
Attempting to find the best 300 Win Mag load thru ladder testing. |
This will be my first shot at ladder testing. I have worked up two different ladder loads each with different bullets weights and powders. I'm hoping to find which load ranges my rifle likes best and fine tune further to arrive at the most accurate loads for my particular rifle. The ladder test is the best process I've found or have heard of to do this effectively. Here's a basic run down of how ladder testing works. At the bottom I have included a link to a great video on Youtube by ryandpahl in his segment "The Road to Precision" that thoroughly explains ladder testing. I'll be sure to post an update of the results from the test. I'm hoping to get out and shoot ladders sometime next week.
Ladder Batch #1 (Shown)
Bullet: 175 gr Sierra Match King BTHP
Powder: Hodgon H4831
Brass: Once fired range brass of various head stamps
Starting Load: 72 grains
Max Load: 76.5 grains
Ladder Increments: .5 grains
Ladder Structure:
- 10 rounds at the starting load of 72 for sighting in at the chosen distance. Beyond 500 yards.
- 3 rounds of each increment with bullet tips painted in a sequence of Green, Red and unpainted with Sharpie.
For Example:
3 rounds at 72 grains - Green
3 rounds at 72.5 grains - Red
3 rounds at 73 grains - unpainted
((repeat sequence))
Ladder Batch #2
Bullet: 168 gr. Speer BTHP
Powder: Winchester 760
Brass: Assorted head stamp once fired range brass
Starting Load: 64 grains
Max Load: 68 grains
Ladder Structure: .5 grain increments
The sharpie color will rub off on the target and will indicate which hole came from which shot. Naturally the shots will climb up the paper as the load increases thus creating the "ladder."
The target is a 48" Tall x 24+" Wide blank paper on a plywood stand. The target must be large because a ladder test results become more obvious the longer the shot and for the best results with a 300 Win Mag you really need to be shooting at 500 yards or more. I hope to set up at 600 or 700 yards if possible.
A target is drawn or placed in the bottom quarter of the paper. A separate steel plate or paper target is set next to the ladder target at the same distance and used to sight in the rifle using the 10 starter loads. Once the rifle is zeroed at this yardage the ladder test can begin and the shooter can take aim at the bulls-eye at the bottom of the clean ladder target.
The shooter loads the first of the three green starters loads and fires the first shot. Afterward it's important to let the barrel cool before taking the next shot in order to eliminate changes due to barrel temperature which can be significant at distances beyond 500 yards. This process is repeated until all the round have been fired, all of which are aimed at the same bulls-eye in the bottom quarter of the ladder target. Even though all the shots are aimed at the same point they should not impact the target all in the same place or you may need to increase the distance to the target.
In order to limit environmental factors that may vary from shot to shot like wind you can shoot the ladder rounds in a variable order rather than 72, 72, 72 then 72.5, 72.5, 72.5 and so forth you would shoot 72, 72.5, 73, 73.5 all the way to max then start at start at the top and work down 76.5, 76, 75.5 and so forth. In the end the painted tips will rub off on the paper and it will be easy to pick out which shot is which but you will want to make a chart of notes to reference later when examining the target as shown taped to the box top in the photo.
What you're looking for in the ladder are places where a group forms. That is to say that a small range of loads all had similar ballistics. This indicates a "sweet spot" or a load who's vibration is in the best harmony with the harmonics of your particular barrel. Once you discover these groups or sweet spots you can further develop your loads using smaller increments to fine tune and find the very best round for your rifle.
Here is a great video by ryandpahl in his segment "the road to precision" on Youtube. He does a great job of thoroughly describing ladder testing.
Results of my first 300 Win Mag ladder test - Coming Soon
First Things First - The Rifle: Remington Model 700 XCR Tactical Long Range

Rifle
Make: Remington
Model: 700 XCR Tactical Long Range
Caliber: 300 Winchester Magnum
Barrel: 26 inch 1 in 10 Twist - 416 stainless steel barreled action with dish-style target crown. Free floating with LTR style fluting. Coated in Trinyte Corrosion Control System.
Stock: Tactical Bell & Carlson with full-length aluminum bedding block. Duel front swivel studs.
Trigger: Remington 40 X Trigger, tested it at 3.25 pounds from the factory.
Remington's Website
Optics
Scope: Nightforce NXS 5.5 - 22 x 56 mm, illuminated NP-R2 reticle, 1/4 MOA turrets.
Base: Nightforce One-Piece with 20 MOA cant.
Accessories: Butler Creek flip up covers.
Nightforce Website
Precision Arms Website - Best Place to buy Nightforce in San Diego
Accessories
Bipod: Harris HBL - 9" to 13"
Harris Bipod's Website
Potential Upgrades
- OPS Inc or Surefire Muzzle Brake Ops Inc Website Surefire Website
- Tune trigger to 2 - 2.5 lbs or replace with Rifle Basix, Jewell or Timney Trigger.
- V-Tac Sling Viking Tactical Website
- Badger Ordinance detachable magazine
- Adjustable cheek piece or McMillan A-5 or A-4 Stock
Subscribe to:
Posts (Atom)